Animations
Fluid, meaningful animations are essential to the mobile user experience. Like
everything in React Native, Animation APIs for React Native are currently under
development, but have started to coalesce around two complementary systems:
LayoutAnimation for animated global layout transactions, and Animated for
more granular and interactive control of specific values.
Animated #
The Animated library is designed to make it very easy to concisely express a
wide variety of interesting animation and interaction patterns in a very
performant way. Animated focuses on declarative relationships between inputs
and outputs, with configurable transforms in between, and simple start/stop
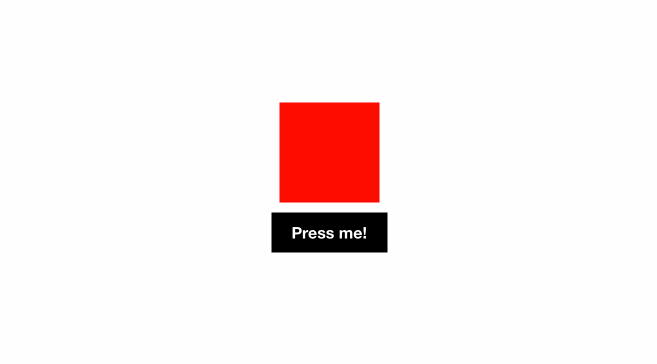
methods to control time-based animation execution. For example, a complete
component with a simple spring bounce on mount looks like this:
bounceValue is initialized as part of state in the constructor, and mapped
to the scale transform on the image. Behind the scenes, the numeric value is
extracted and used to set scale. When the component mounts, the scale is set to
1.5 and then a spring animation is started on bounceValue which will update
all of its dependent mappings on each frame as the spring animates (in this
case, just the scale). This is done in an optimized way that is faster than
calling setState and re-rendering. Because the entire configuration is
declarative, we will be able to implement further optimizations that serialize
the configuration and runs the animation on a high-priority thread.
Core API #
Most everything you need hangs directly off the Animated module. This
includes two value types, Value for single values and ValueXY for vectors,
three animation types, spring, decay, and timing, and three component
types, View, Text, and Image. You can make any other component animated with
Animated.createAnimatedComponent.
The three animation types can be used to create almost any animation curve you want because each can be customized:
spring: Simple single-spring physics model that matches Origami.friction: Controls "bounciness"/overshoot. Default 7.tension: Controls speed. Default 40.
decay: Starts with an initial velocity and gradually slows to a stop.velocity: Initial velocity. Required.deceleration: Rate of decay. Default 0.997.
timing: Maps time range to easing value.duration: Length of animation (milliseconds). Default 500.easing: Easing function to define curve. SeeEasingmodule for several predefined functions. iOS default isEasing.inOut(Easing.ease).delay: Start the animation after delay (milliseconds). Default 0.
Animations are started by calling start. start takes a completion callback
that will be called when the animation is done. If the animation is done
because it finished running normally, the completion callback will be invoked
with {finished: true}, but if the animation is done because stop was called
on it before it could finish (e.g. because it was interrupted by a gesture or
another animation), then it will receive {finished: false}.
Composing Animations #
Animations can also be composed with parallel, sequence, stagger, and
delay, each of which simply take an array of animations to execute and
automatically calls start/stop as appropriate. For example:
By default, if one animation is stopped or interrupted, then all other
animations in the group are also stopped. Parallel has a stopTogether option
that can be set to false to disable this.
Interpolation #
Another powerful part of the Animated API is the interpolate function. It
allows input ranges to map to different output ranges. For example, a simple
mapping to convert a 0-1 range to a 0-100 range would be
interpolate supports multiple range segments as well, which is handy for
defining dead zones and other handy tricks. For example, to get an negation
relationship at -300 that goes to 0 at -100, then back up to 1 at 0, and then
back down to zero at 100 followed by a dead-zone that remains at 0 for
everything beyond that, you could do:
Which would map like so:
| Input | Output |
|---|---|
| -400 | 450 |
| -300 | 300 |
| -200 | 150 |
| -100 | 0 |
| -50 | 0.5 |
| 0 | 1 |
| 50 | 0.5 |
| 100 | 0 |
| 101 | 0 |
| 200 | 0 |
interpolation also supports arbitrary easing functions, many of which are
already implemented in the
Easing
class including quadratic, exponential, and bezier curves as well as functions
like step and bounce. interpolation also has configurable behavior for
extrapolation, the default being 'extend', but 'clamp' is also very useful
to prevent the output value from exceeding outputRange.
Tracking Dynamic Values #
Animated values can also track other values. Just set the toValue of an
animation to another animated value instead of a plain number, for example with
spring physics for an interaction like "Chat Heads", or via timing with
duration: 0 for rigid/instant tracking. They can also be composed with
interpolations:
ValueXY is a handy way to deal with 2D interactions, such as panning/dragging.
It is a simple wrapper that basically just contains two Animated.Value
instances and some helper functions that call through to them, making ValueXY
a drop-in replacement for Value in many cases. For example, in the code
snippet above, leader and follower could both be of type ValueXY and the x
and y values will both track as you would expect.
Input Events #
Animated.event is the input side of the Animated API, allowing gestures and
other events to map directly to animated values. This is done with a structured
map syntax so that values can be extracted from complex event objects. The
first level is an array to allow mapping across multiple args, and that array
contains nested objects. In the example, you can see that scrollX maps to
event.nativeEvent.contentOffset.x (event is normally the first arg to the
handler), and pan.x and pan.y map to gestureState.dx and gestureState.dy,
respectively (gestureState is the second arg passed to the PanResponder handler).
Responding to the Current Animation Value #
You may notice that there is no obvious way to read the current value while animating - this is because the value may only be known in the native runtime due to optimizations. If you need to run JavaScript in response to the current value, there are two approaches:
spring.stopAnimation(callback)will stop the animation and invokecallbackwith the final value - this is useful when making gesture transitions.spring.addListener(callback)will invokecallbackasynchronously while the animation is running, providing a recent value. This is useful for triggering state changes, for example snapping a bobble to a new option as the user drags it closer, because these larger state changes are less sensitive to a few frames of lag compared to continuous gestures like panning which need to run at 60fps.
Future Work #
As previously mentioned, we're planning on optimizing Animated under the hood to make it even more performant. We would also like to experiment with more declarative and higher level gestures and triggers, such as horizontal vs. vertical panning.
The above API gives a powerful tool for expressing all sorts of animations in a
concise, robust, and performant way. Check out more example code in
UIExplorer/AnimationExample. Of course there may still be times where Animated
doesn't support what you need, and the following sections cover other animation
systems.
LayoutAnimation (iOS only) #
LayoutAnimation allows you to globally configure create and update
animations that will be used for all views in the next render/layout cycle.
This is useful for doing flexbox layout updates without bothering to measure or
calculate specific properties in order to animate them directly, and is
especially useful when layout changes may affect ancestors, for example a "see
more" expansion that also increases the size of the parent and pushes down the
row below which would otherwise require explicit coordination between the
components in order to animate them all in sync.
Note that although LayoutAnimation is very powerful and can be quite useful,
it provides much less control than Animated and other animation libraries, so
you may need to use another approach if you can't get LayoutAnimation to do
what you want.
This example uses a preset value, you can customize the animations as you need, see LayoutAnimation.js for more information.
requestAnimationFrame #
requestAnimationFrame is a polyfill from the browser that you might be
familiar with. It accepts a function as its only argument and calls that
function before the next repaint. It is an essential building block for
animations that underlies all of the JavaScript-based animation APIs. In
general, you shouldn't need to call this yourself - the animation API's will
manage frame updates for you.
react-tween-state (Not recommended - use Animated instead) #
react-tween-state is a
minimal library that does exactly what its name suggests: it tweens a
value in a component's state, starting at a from value and ending at
a to value. This means that it generates the values in between those
two values, and it sets the state on every requestAnimationFrame with
the intermediary value.
Tweening definition from Wikipedia
"... tweening is the process of generating intermediate frames between two images to give the appearance that the first image evolves smoothly into the second image. [Tweens] are the drawings between the key frames which help to create the illusion of motion."
The most obvious way to animate from one value to another is linearly: you subtract the end value from the start value and divide the result by the number of frames over which the animation occurs, and then add that value to the current value on each frame until the end value is reached. Linear easing often looks awkward and unnatural, so react-tween-state provides a selection of popular easing functions that can be applied to make your animations more pleasing.
This library does not ship with React Native - in order to use it on
your project, you will need to install it with npm i react-tween-state
--save from your project directory.

Here we animated the opacity, but as you might guess, we can animate any numeric value. Read more about react-tween-state in its README.
Rebound (Not recommended - use Animated instead) #
Rebound.js is a JavaScript port of
Rebound for Android. It is
similar in concept to react-tween-state: you have an initial value and
set an end value, then Rebound generates intermediate values that you can
use for your animation. Rebound is modeled after spring physics; we
don't provide a duration when animating with springs, it is
calculated for us depending on the spring tension, friction, current
value and end value. Rebound is used
internally
by React Native on Navigator and WarningBox.

Notice that Rebound animations can be interrupted - if you release in the middle of a press, it will animate back from the current state to the original value.
You can also clamp the spring values so that they don't overshoot and
oscillate around the end value. In the above example, we would add
this._scrollSpring.setOvershootClampingEnabled(true) to change this.
See the below gif for an example of where in your interface you might
use this.
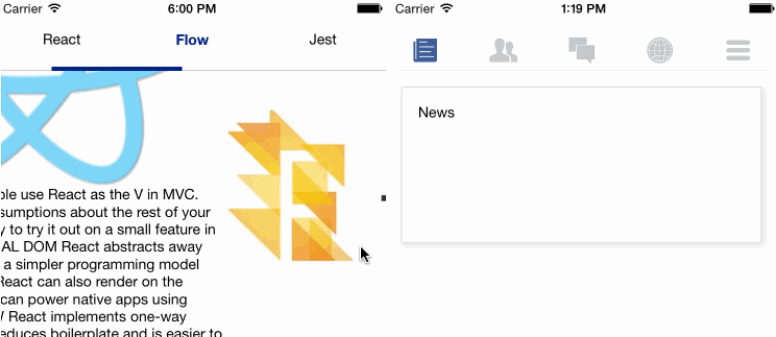 Screenshot from
react-native-scrollable-tab-view.
You can run a similar example here.
Screenshot from
react-native-scrollable-tab-view.
You can run a similar example here.
A sidenote about setNativeProps #
As mentioned in the Direction Manipulation section,
setNativeProps allows us to modify properties of native-backed
components (components that are actually backed by native views, unlike
composite components) directly, without having to setState and
re-render the component hierarchy.
We could use this in the Rebound example to update the scale - this
might be helpful if the component that we are updating is deeply nested
and hasn't been optimized with shouldComponentUpdate.
It would not make sense to use setNativeProps with react-tween-state
because the updated tween values are set on the state automatically by
the library - Rebound on the other hand gives us an updated value for
each frame with the onSpringUpdate function.
If you find your animations with dropping frames (performing below 60
frames per second), look into using setNativeProps or
shouldComponentUpdate to optimize them. You may also want to defer any
computationally intensive work until after animations are complete,
using the
InteractionManager. You
can monitor the frame rate by using the In-App Developer Menu "FPS
Monitor" tool.
Navigator Scene Transitions #
As mentioned in the Navigator
Comparison,
Navigator is implemented in JavaScript and NavigatorIOS is a wrapper
around native functionality provided by UINavigationController, so
these scene transitions apply only to Navigator. In order to re-create
the various animations provided by UINavigationController and also
make them customizable, React Native exposes a
NavigatorSceneConfigs API.
For further information about customizing scene transitions, read the source.