Tutorial
Preface #
This tutorial aims to get you up to speed with writing iOS and Android apps using React Native. If you're wondering what React Native is and why Facebook built it, this blog post explains that.
We assume you have experience writing applications with React. If not, you can learn about it on the React website.
Setup #
React Native requires the basic setup explained at React Native Getting Started.
After installing these dependencies there are two simple commands to get a React Native project all set up for development.
npm install -g react-native-clireact-native-cli is a command line interface that does the rest of the set up. It’s installable via npm. This will install
react-nativeas a command in your terminal. You only ever need to do this once.react-native init AwesomeProjectThis command fetches the React Native source code and dependencies and then creates a new Xcode project in
AwesomeProject/iOS/AwesomeProject.xcodeprojand a gradle project inAwesomeProject/android/app.
Development #
For iOS, you can now open this new project (AwesomeProject/ios/AwesomeProject.xcodeproj) in Xcode and simply build and run it with ⌘+R. Doing so will also start a Node server which enables live code reloading. With this you can see your changes by pressing ⌘+R in the simulator rather than recompiling in Xcode.
For Android, run react-native run-android from AwesomeProject to install the generated app on your emulator or device, and start the Node server which enables live code reloading. To see your changes you have to open the rage-shake-menu (either shake the device or press the menu button on devices, press F2 or Page Up for emulator, ⌘+M for Genymotion), and then press Reload JS.
For this tutorial we'll be building a simple version of the Movies app that fetches 25 movies that are in theaters and displays them in a ListView.
Hello World #
react-native init will generate an app with the name of your project, in this case AwesomeProject. This is a simple hello world app. For iOS, you can edit index.ios.js to make changes to the app and then press ⌘+R in the simulator to see the changes. For Android, you can edit index.android.js to make changes to the app and press Reload JS from the rage shake menu to see the changes.
Mocking data #
Before we write the code to fetch actual Rotten Tomatoes data let's mock some data so we can get our hands dirty with React Native. At Facebook we typically declare constants at the top of JS files, just below the requires, but feel free to add the following constant wherever you like. In index.ios.js or index.android.js :
Render a movie #
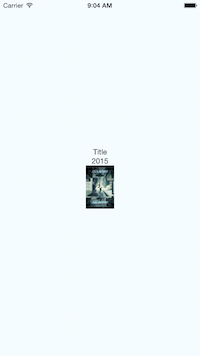
We're going to render the title, year, and thumbnail for the movie. Since thumbnail is an Image component in React Native, add Image to the list of React requires below.
Now change the render function so that we're rendering the data mentioned above rather than hello world.
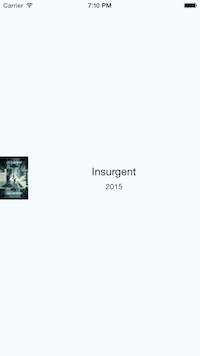
Press ⌘+R / Reload JS and you should see "Title" above "2015". Notice that the Image doesn't render anything. This is because we haven't specified the width and height of the image we want to render. This is done via styles. While we're changing the styles let's also clean up the styles we're no longer using.
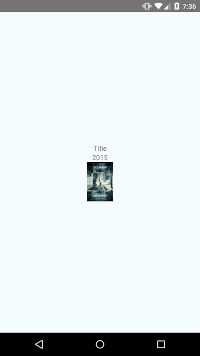
And lastly we need to apply this style to the Image component:
Press ⌘+R / Reload JS and the image should now render.
Add some styling #
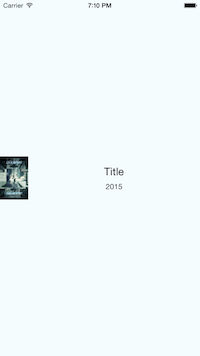
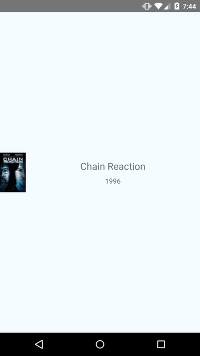
Great, we've rendered our data. Now let's make it look better. I'd like to put the text to the right of the image and make the title larger and centered within that area:
We'll need to add another container in order to vertically lay out components within horizontally layed out components.
Not too much has changed, we added a container around the Texts and then moved them after the Image (because they're to the right of the Image). Let's see what the style changes look like:
We use FlexBox for layout - see this great guide to learn more about it.
In the above code snippet, we simply added flexDirection: 'row' that will make children of our main container to be layed out horizontally instead of vertically.
Now add another style to the JS style object:
This means that the rightContainer takes up the remaining space in the parent container that isn't taken up by the Image. If this doesn't make sense, add a backgroundColor to rightContainer and then try removing the flex: 1. You'll see that this causes the container's size to be the minimum size that fits its children.
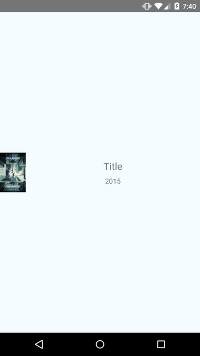
Styling the text is pretty straightforward:
Go ahead and press ⌘+R / Reload JS and you'll see the updated view.
Fetching real data #
Fetching data from Rotten Tomatoes's API isn't really relevant to learning React Native so feel free to breeze through this section.
Add the following constants to the top of the file (typically below the requires) to create the REQUEST_URL used to request data with.
Add some initial state to our application so that we can check this.state.movies === null to determine whether the movies data has been loaded or not. We can set this data when the response comes back with this.setState({movies: moviesData}). Add this code just above the render function inside our React class.
We want to send off the request after the component has finished loading. componentDidMount is a function of React components that React will call exactly once, just after the component has been loaded.
Now add fetchData function used above to our main component. This method will be responsible for handling data fetching. All you need to do is call this.setState({movies: data}) after resolving the promise chain because the way React works is that setState actually triggers a re-render and then the render function will notice that this.state.movies is no longer null. Note that we call done() at the end of the promise chain - always make sure to call done() or any errors thrown will get swallowed.
Now modify the render function to render a loading view if we don't have any movies data, and to render the first movie otherwise.
Now press ⌘+R / Reload JS and you should see "Loading movies..." until the response comes back, then it will render the first movie it fetched from Rotten Tomatoes.
ListView #
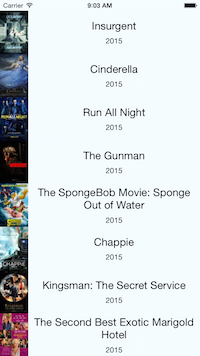
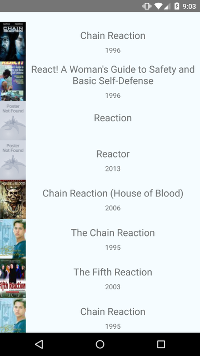
Let's now modify this application to render all of this data in a ListView component, rather than just rendering the first movie.
Why is a ListView better than just rendering all of these elements or putting them in a ScrollView? Despite React being fast, rendering a possibly infinite list of elements could be slow. ListView schedules rendering of views so that you only display the ones on screen and those already rendered but off screen are removed from the native view hierarchy.
First things first: add the ListView require to the top of the file.
Now modify the render function so that once we have our data it renders a ListView of movies instead of a single movie.
The dataSource is an interface that ListView is using to determine which rows have changed over the course of updates.
You'll notice we used dataSource from this.state. The next step is to add an empty dataSource to the object returned by getInitialState. Also, now that we're storing the data in dataSource, we should no longer use this.state.movies to avoid storing data twice. We can use boolean property of the state (this.state.loaded) to tell whether data fetching has finished.
And here is the modified fetchData method that updates the state accordingly:
Finally, we add styles for the ListView component to the styles JS object:
And here's the final result:
There's still some work to be done to make it a fully functional app such as: adding navigation, search, infinite scroll loading, etc. Check the Movies Example to see it all working.